
Hardware virtualization allows your computer’s CPU to act as if you have multiple, separate CPUs. Enabling or disabling this feature can greatly affect performance and compatibility with certain software and virtual machines.
To enable or disable virtualization, the steps can vary depending on the motherboard manufacturer and CPU type, whether it's Intel or AMD. Here’s how to do it using an Asus ROG Motherboard with an AMD CPU, but you can find similar options on your device.
- Restart your computer and enter the BIOS: If you're not sure which key to press to enter the BIOS or UEFI Setup menu, you might find our article "How To Enter BIOS or UEFI by Manufacturer" helpful.
- Switch to Advanced Mode: Once you're in the BIOS or UEFI setup menu, if you're in easy mode, switch to advanced mode. For this motherboard, click on ‘Advanced Mode’ or press F7.
- Navigate to the appropriate tab: Look for options under the Advanced, Configuration, System, or Security tabs. Search for terms like Intel Virtualization Technology, VMX, VT-X, Vanderpool, AMD Virtualization, AMD-V, or AMD-SVM. Enable or disable them according to your preference.
- Check for multiple options: If you see more than one option like Intel Virtualization Technology or AMD Virtualization and Intel VT-d or AMD-IOMMU, you may want to enable or disable both.
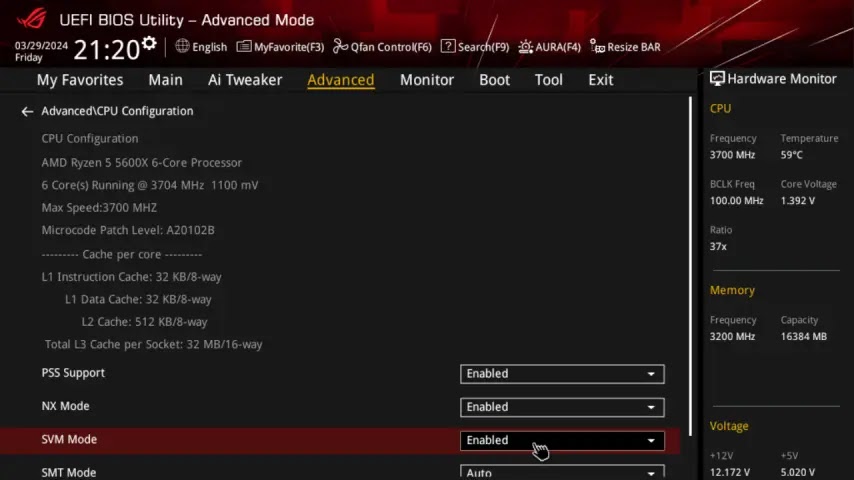
- Set SVM Mode: Go to the Advanced tab, and click on CPU Configuration. Ensure SVM mode is set according to your preference.
- Save and exit: Finally, save the changes and exit by navigating to the Exit tab and clicking ‘Save Changes and Reset’ or pressing F10.
Enabling or disabling hardware virtualization can significantly impact your system's compatibility with certain applications and virtual machines. Always ensure to follow the correct steps for your specific hardware.
Tags
Firmware